Tuesday, March 31, 2009
Wowie Zowie!
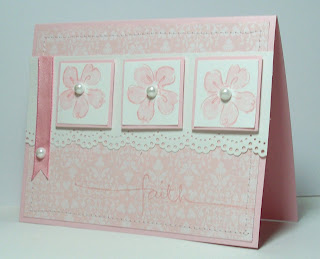
I'm getting a great response to this card I created in the middle of the night - when I couldn't sleep.
This is a hinge card. You get to see the card closed and open in the same photo. Am I tricky, or what? The top of the card just turns up so you can see the inside (the message once I figure out who to send it to). It hinges at the flower on the left with a brad through it. I also like the top edge looking like a fence and the flowers going down behind it when it is closed. The main image was stamped and embossed before adding a little color with a blender pen and the ink from the lid of the pad. I also cut out two small flowers from the dp and glued one on the inside and the other is popped up with a dimensional over the flower on the main image.
So, do you like it? Don't tell me if you don't. I only want to hear the positive! LOL ; )
Monday, March 30, 2009
Keeping it simple
Never ending!
Sunday, March 29, 2009
I just had to!
Thursday, March 26, 2009
Too much fun!
So I was so happy with my spring blocks that I decided to make my summer ones. I think I like them even more. Don't tell Spring though. lol I love the look of the red check. Doesn't it remind you of a summer picnic? And the white picket fence too!!!! Just the cutest. I had to take close ups so you can see the detail. It's too good to miss.
Wednesday, March 25, 2009
Has Spring Sprung?
I think it has! Well it has here in Phoenix anyway.
I created this project for some friends of mine to make tomorrow. I am really pleased with the way these blocks turned out. Now I want to make a few more - you know - summer, autumn, winter. Isn't that convenient that all the seasons have six letters in them? That way I can use the backs of the blocks and make them reversible, saving storage space.
Anywho, here is the photo of my spring blocks. I would love to know what you think of them.
Friday, March 20, 2009
Thursday, March 19, 2009
Cotton Scraps
Today's challenge was to use a sticker. I picked up a few at Michael's really cheap and so I had to find something to go with it.
I chose this cotton scrap by Crafty Secrets. I cut it out with a scalloped rectangle Nestabilities die and mounted it onto Riding Hood Red card stock. I embossed the White card front with a Sizzix folder. I used Red Riding Hood taffeta ribbon and then the sticker, framed with the vanilla hodgepodge hardware. I think it looks pretty good - what do you think?
Wednesday, March 18, 2009
Good morning!
Here are a couple of cards I just created. Take a look!
The blue butterfly card was inspired by an ad I saw recently with this beautiful blue butterfly on it. It was really striking, so I tried to capture that with this card. I inked up the Spellbinders butterfly die with brilliant blue craft ink, cut and embossed and then used clear ep and heat embossed. The panel behind it is embossed with a Sizzix embossing folder. The panels are embossed with D'Vine Swirl cuttlebug embossing folder. The black butterflies are a Martha Stewart punch. I'm likin' the way the blue pops from the black.
I was visiting at my daugther's home and used her new stamps to create the rose card. I stamped the main rose with black craft and clear embossed, then masked it to stamp the other roses. I watercolored them yellow and then added the Riding Hood Red to the main image only to make it pop a bit. I mounted the roses onto black cs and cut around the stamped images, leaving a slight black border before mounting onto the Kraft. The sentiment is stamped with black craft and clear embossed and then I added just a touch of riding hood red before mounting onto the scalloped mat. In honor of my friend Wendy, I dangled the sentiment with black grosgrain, then added an organdy bow which was curled with the heat gun.
I'm thinking of giving away some of my cards on this blog. Blog/Card candy. Is anyone interested?
Monday, March 16, 2009
Happy Monday!
Hi there! Thanks for stopping by.
I woke up about 4 AM and kept trying to go back to sleep. It didn't work, so I got up about 5. I'm gonna need a nap today!
As long as I was up, I had to check out SCS for the newest challenge. It was there waiting for me, so I just had to try making a ribbon frame. Isn't it pretty? I inked up the stamp with markers and then stamped. The brown second stage is also embossed with clear ep. I distressed the edges of the white panel with my fingernail before mounting to the brown frame. The main card is embossed with a Sizzix folder my sweet friend Terri sent me! It came with four more small folders too. I'm so blessed! Thanks {{{{Terri}}}}. I am lovin' it.
I hope today starts off a great week for you! Thanks again for stopping by!
Hugs,
Karen
And, I have to show you the card I created on Saturday. I thought it turned out so cute! I took inspiration from a cute little teapot found here.
I cut the shape out using a template found on the internet, then water colored most of it and used chalk for the cheeks and ears. I used my markers to sharpen up the lines on the design, and a sharpie for the mouth and eyes. The sentiment is supposed to resemble an egg.
Friday, March 13, 2009
And where have I been?
Playing with grandkids! That's just about the only thing that gets me away from my addiction, er, I mean hobby!
Sunday I went to my grand niece's birthday party. Hey, I didn't even take a photo of the birthday girl. Oooo, I guess I'm not much of a great aunt! She's 2!
Tuesday night I got to go to my grandson's band concert. He plays drums. It was amazingly good, especially after having attended a few elementary school band concerts. lol Sorry, no photos of him either. The percussionists are in the way back and you can't even see them on the stage!
Thursday was my youngest grandson's birthday! Oh what fun! I gave him one of his gifts (a hula hoop) a few days early, and he learned to use it within minutes! Not long after that he had his and his sister's hula hoops going at the same time! He is an amazing child! He is super coordinated and smart! I told his Mom she could have sent him to kindergarten as a four year old and no one would have known he wasn't 5. lol He asked his Mom to make him Cookie Monster cupcakes, and she did a great job on them.
And last but not least, I got to see my youngest little granddaughter. She is walking all over the place now and so much fun! This photo was shot as she was enjoying her dinner of avocado and yogurt! Yum!
So, as you can see, I had a great time with the kids!
Wednesday, March 11, 2009
Sneak a peek!
Here is another sneak peek of a set being released by Treehouse Stamps this Friday! This set is Birthday Cupcake. I added the sprinkles on the cupcake with both the stamp included with the set and stickles. Gotta have a little bling, don't ya? I dangled the sentiment once again. It's kinda cute that way, I think.
Thanks for stopping by.
Tuesday, March 10, 2009
Sneak Peek!
Now why aren't these words spelled the same? The English language is so confusing sometimes.
Anyway, this is a glimpse of a new set being released by Treehouse Stamps this Friday, yikes! It's Friday the 13th!!!!!
I used the "MY MOM" set which has this lovely lily and some sweet sentiments. I stamped the flowers with black craft ink and then clear embossed before watercoloring. Don't you love that new border punch by SU!? It's so saaaaweeeet! Don't you just love the dangling sentiment? I picked that up from my friend Wendybell. It isn't exactly the way she does it, but close. It's a fun way to add a sentiment, I think. So, I hope you like this card. If you would like me to send it to you, just leave a reply and I will randomly choose a winner. That is if I get more than one comment. lol
Thanks for stopping by!
Sunday, March 8, 2009
Congrats to Judy!
Saturday, March 7, 2009
Thanks a bunch
I created this card for the SCS Inspiration challenge.
I colored the image with my SU markers. The sentiment uses several different punches and layers them with the leaves and banana which is really popped up. Don't you like the corners being punched? It really adds an amazing amount of interest to the whole design.
I hope you like it.
Thanks for stopping by. Have a great weekend!
Make it quick!
Dawn's challenge on SCS was to make a card in less than 30 minutes. Since I made an ATC (artist trading card) on Thursday and didn't know what else to do with it, I used it to create one of my cards for Dawn's challenge. The ATC is the small 2-1/2"X3-1/2" portion on the card. I stamped the blush blossom cardstock with the same color ink using a flower stamp. It is very subtle, but looks good. The sentiment is stamped with Ruby Red ink and mounted onto a small piece of the ruby red card stock and applied to the blush blossom card. I then punched two holes with my handy dandy crop-o-dile and added the ribbon. The gorgeous butterfly is created by reverse embossing the butterfly using a Spellbinders die called Flying Beauties. If you need info on how to do the reverse embossing, just ask. I then watercolored the butterfly, added some dots and then a bit of glue and dazzling diamonds. Butterflies gotta have glitter, right? I added a small half bead for the head. I layered my ATC onto a rectangle of ruby red cardstock which was cut with deckle edge scissors and then embossed with the swiss dots cuttlebug folder. This was all mounted onto a cameo coral card which was embossed with the cuttlebug folder divine swirls.
Fast cards are great, so I created another one. The Almost Amethyst card was created using a Cuttlebug border folder and some lovely designer paper. I added some purple rhinestones to the centers of the flowers and a sentiment with the ribbon through the center, creating the look of a button. I didn't have the right color ribbon, so once again I colored the white organdy ribbon with my marker. Perfect every time!
What do you think?
Thursday, March 5, 2009
Monday, March 2, 2009
A new week
And using one of my favorite sets, Roses in Winter. Lynn's SCS challenge to day was to make a crimped envelope card. I've done these before and they really are fun.
I cut a window through the front of my envelope with a Spellbinders Nestability Label One, then lined it with vellum. I stamped the sentiment on the vellum with always artichoke craft ink and used clear embossing powder. I stamped the smaller flower images around the cut out on the outside of the envelope. The card inside is stamped with the large rose and leaves. I added one embossed piece of cs to the top of the envelope, a punched lace border and heated organdy ribbon bow. I colored the white organdy ribbon with markers.
This is also for Janette's Sweet 'n' Sassy challenge found here.
Subscribe to:
Posts (Atom)