I'm sure you are wondering, "How does Karen organize ALL her stuff?"
I do have a lot of stuff in my stamp room and I LOVE LOVE LOVE it. I had to clean up a bit yesterday (had the windows cleaned inside and out, so had to move my table away from the window) plus I got some new stuff to add to my collection, so I took some photos for you and thought I would share. It might help you get your stuff organized. OR, if you have some great organization tips, please feel free to share them in a comment. I would love to know how you organize.
Stamps sets:
I have lots of stamp sets. First of all, here is how I organize my stamps from Rubbernecker:

As soon as I get new stamps, I add them to my own personal catalog. I usually copy the picture of the stamps from the website and add it to a document, along with the SKU number so I can find it again if I need to. See that under each image. I then hand write which container they are in. I have two kinds I use for these stamps.
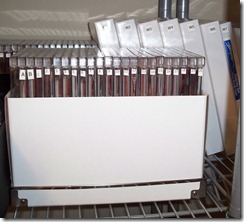
Notice two types of containers in this photo – the white ones in the back and the clear in the front.
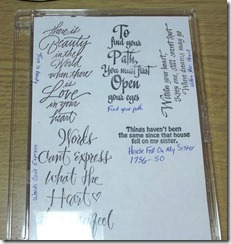
I have a lot of the clear DVD cases. The Rubbernecker stamps are on cling mount, so they stick to the containers. I add a printed sheet of what stamps are in there as well. This is especially helpful for the sentiments, as they are hard to read backwards on the stamps. lol
The other containers (white ones in the photo two up) I have are from Rubbernecker. You can find them here. I can get a lot of stamps in each one. Notice I use my labeler to number each container.
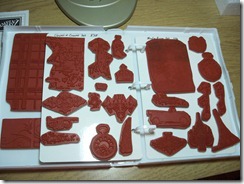

These are my stamps from Mark’s Finest Papers. They are in a photo storage box on their sides and I have them alphabetically by the set names. I have a catalog on my computer with all the stamps I have from them, so I can scroll through to find just the right one and then find it easily.


Now here are my punches. I am in a rental home and didn’t want to put a lot of holes in the wall so I came up with this solution. The bars are from IKEA. They are for wall organization in the kitchen, I think. I bought two 1X2’s (very inexpensive) at Lowe’s. I then screwed the bars onto them. The hardest part is getting them level, but that’s not too bad, even for me. I propped this against the wall and put my punches on. Oooops, it was too far from the wall so I needed something to hold them more upright. Well, I had these metal strips from IKEA (I can’t find them there any more though. sniff sniff) so I screwed them on just above the bars. Perfect! Unfortunately, I needed three more, but since I can’t get them, I went back to the Home Improvement store and bought their very inexpensive yardsticks, cut them to the proper length (21"-1/8”) and used them. Yea! It works! (you can see the yardstick on the top row of the close up) So now I can see my punches in a quick glance and get right to them.

I got some new Spellbinders dies and added them to my collection. I also keep them in the clear DVD cases. I bought them here.
I am again too late smart and just decided to organize my newest dies like this. I cut the packaging they came in with the image on it to a size to fit in the cases, then I backed it with the stick on magnetic sheets (I bought these from Oriental Trading for a good price.) Now I put the dies on the magnetic side. I also catalog all my dies, otherwise they would be forgotten and that would be just too sad.

I got some new Copic colors too, so added them to my collection. The pink, red, yellow and green are in a storage wallet I got from Copic. The blues and grays are in a container from Copic as well. I had too many markers though and so went into my kitchen and got the containers that the Great Value (Wal Mart) drink mix comes in. I put the browns into one and the purples into another. They are all standing in a collapsible container I got at IKEA and are just to my left when I am stamping.
I was throwing something away and had some styrofoam inserts and I said to myself – “Self, you can use that to make bows!” So, I got some bamboo skewers from my kitchen and cut them a little shorter and stuck them into the foam. This is great because you can move them at intervals to create bows of different sizes. All this cost what? Less than a penny? Oh yeah, thriftiness.
Here is how I tie a bow with this little goody.

Loop a length of ribbon around the two skewers and cross the ends.

Now take those ends and wrap them to the back, cross and loop one end through and pull.

Tighten as much or as little as you wish.
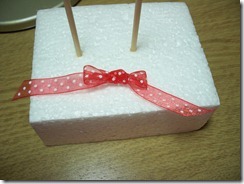
Slip the loops off and there you have a perfect bow. Now you can create dozens or even hundreds of bows exactly the same size. So easy!
Okey dokey, I think that is all I have for you today. Thanks so much for stopping by. I would love to know what you think of my tips here and if you have some of your own you think I could use, please leave them for me.
Please come again soon! Hugs ~ Karen
I do have a lot of stuff in my stamp room and I LOVE LOVE LOVE it. I had to clean up a bit yesterday (had the windows cleaned inside and out, so had to move my table away from the window) plus I got some new stuff to add to my collection, so I took some photos for you and thought I would share. It might help you get your stuff organized. OR, if you have some great organization tips, please feel free to share them in a comment. I would love to know how you organize.
Stamps sets:
I have lots of stamp sets. First of all, here is how I organize my stamps from Rubbernecker:

As soon as I get new stamps, I add them to my own personal catalog. I usually copy the picture of the stamps from the website and add it to a document, along with the SKU number so I can find it again if I need to. See that under each image. I then hand write which container they are in. I have two kinds I use for these stamps.

Notice two types of containers in this photo – the white ones in the back and the clear in the front.
I have a lot of the clear DVD cases. The Rubbernecker stamps are on cling mount, so they stick to the containers. I add a printed sheet of what stamps are in there as well. This is especially helpful for the sentiments, as they are hard to read backwards on the stamps. lol

The other containers (white ones in the photo two up) I have are from Rubbernecker. You can find them here. I can get a lot of stamps in each one. Notice I use my labeler to number each container.


These are my stamps from Mark’s Finest Papers. They are in a photo storage box on their sides and I have them alphabetically by the set names. I have a catalog on my computer with all the stamps I have from them, so I can scroll through to find just the right one and then find it easily.


Now here are my punches. I am in a rental home and didn’t want to put a lot of holes in the wall so I came up with this solution. The bars are from IKEA. They are for wall organization in the kitchen, I think. I bought two 1X2’s (very inexpensive) at Lowe’s. I then screwed the bars onto them. The hardest part is getting them level, but that’s not too bad, even for me. I propped this against the wall and put my punches on. Oooops, it was too far from the wall so I needed something to hold them more upright. Well, I had these metal strips from IKEA (I can’t find them there any more though. sniff sniff) so I screwed them on just above the bars. Perfect! Unfortunately, I needed three more, but since I can’t get them, I went back to the Home Improvement store and bought their very inexpensive yardsticks, cut them to the proper length (21"-1/8”) and used them. Yea! It works! (you can see the yardstick on the top row of the close up) So now I can see my punches in a quick glance and get right to them.

I got some new Spellbinders dies and added them to my collection. I also keep them in the clear DVD cases. I bought them here.
I am again too late smart and just decided to organize my newest dies like this. I cut the packaging they came in with the image on it to a size to fit in the cases, then I backed it with the stick on magnetic sheets (I bought these from Oriental Trading for a good price.) Now I put the dies on the magnetic side. I also catalog all my dies, otherwise they would be forgotten and that would be just too sad.

I got some new Copic colors too, so added them to my collection. The pink, red, yellow and green are in a storage wallet I got from Copic. The blues and grays are in a container from Copic as well. I had too many markers though and so went into my kitchen and got the containers that the Great Value (Wal Mart) drink mix comes in. I put the browns into one and the purples into another. They are all standing in a collapsible container I got at IKEA and are just to my left when I am stamping.
I was throwing something away and had some styrofoam inserts and I said to myself – “Self, you can use that to make bows!” So, I got some bamboo skewers from my kitchen and cut them a little shorter and stuck them into the foam. This is great because you can move them at intervals to create bows of different sizes. All this cost what? Less than a penny? Oh yeah, thriftiness.
Here is how I tie a bow with this little goody.

Loop a length of ribbon around the two skewers and cross the ends.

Now take those ends and wrap them to the back, cross and loop one end through and pull.

Tighten as much or as little as you wish.

Slip the loops off and there you have a perfect bow. Now you can create dozens or even hundreds of bows exactly the same size. So easy!
Okey dokey, I think that is all I have for you today. Thanks so much for stopping by. I would love to know what you think of my tips here and if you have some of your own you think I could use, please leave them for me.
Please come again soon! Hugs ~ Karen


